
So, your vehicle’s timing belt has broken down and you need to realign the cam and crank gears to change the belt? Don’t know how to do it? We’re here to help you with just that. Changing the timing belt is pretty easy but you do need to be precise while doing so. For that, you need appropriate knowledge about the alignment of the timing belt and the cam and crankshaft setup.
Start by installing and tightening the sprockets of the camshaft and crankshaft. Then, align their timing marks, reinstall the tensioner, and finally align the cam and crank gears. Keep reading to find detailed information about these steps!
Table of Contents
When Do You Need To Align or Realign Camshaft And Crankshaft?
It is imperative to realign the cam and crank while you change or repair the timing belt. The timing belt is located inside the internal combustion engine and is important for the engine to work properly. Now, it can last for thousands of miles but it is recommended that you change it every 60,000 miles.
There is usually not much indication if your timing belt has broken, could break, or is worn out, so it is best to change it regularly. This will prevent potential damage to the engine if the timing belt snaps off.
A Step By Step Guide On How To Align Cam And Crank
The right way to align the camshaft and crankshaft varies from one engine to another. Generally, there are markings, on the block and logbook of the crank and cam pulleys, that you need to place in a specific orientation concerning each other. Once done, you’ll have to reinstall the timing belt. We recommend that you should gather specific information about the engine you are working on (refer to your vehicle’s manual for this) before starting the procedure.
Note: If the timing belt has worn out and broken, then you must do a cylinder leak-down test before realigning the cam and crank gears. This is to ensure that the valves have not been bent or damaged due to the failure.
Given below is a list of tools required for the realignment of cam and crank and then, we’ll move on to the step-by-step instructions:
Tools Required:
- HammerHammer
- Retainer bolts
- Socket wrench
- Ratchet wrench
- Timing belt (if it needs replacement)
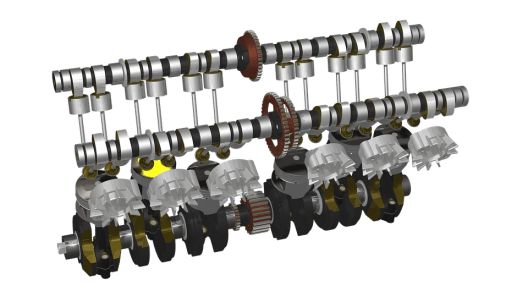
Step 1. Installing And Tightening The Sprockets
First things firsts, installing the sprockets is a step you cannot miss while realigning your vehicle’s cam and crankshaft. To do this, you need to disconnect the battery’s negative cable. Then, put the sprockets on their corresponding right-sized shafts. Once done, install and tighten them with retainer bolts. Lastly, turn on the tensioner pullers to check if there is bearing wear or not.
Step 2. Align The Timing Marks
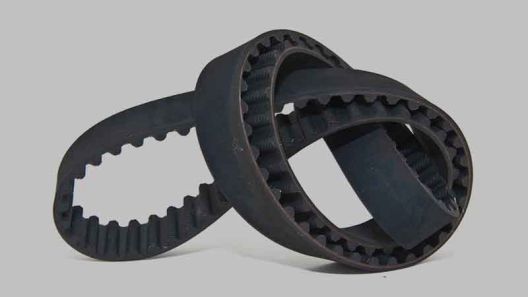
You’ll find that the crankshaft has timing marks etched on it. Put it on TDC. You need to align the crankshaft’s gear key and the keyway. To do so, you need to align the crankshaft and the silent shaft sprockets’ markings and make sure that they are matching with the marks on the front case. After you have successfully done that, start wrapping the timing belt over the sprockets and ensure that it is tight. Take care that you leave no stress in the upper part of the timing belt.
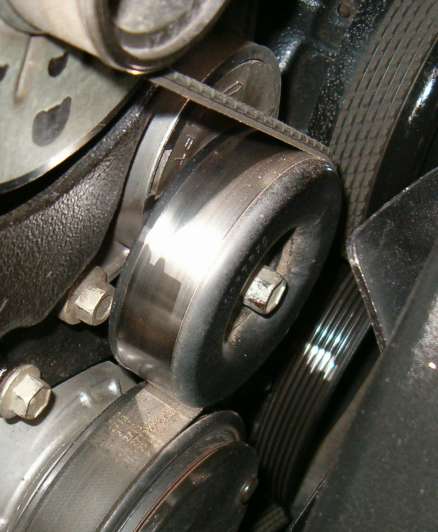
Step 3. Reinstalling Tensioner Pulley
Install the puller and move it in a way that its longer side diverts by approximately 1/4th inch. Once done, pull the tensioner to place it in close vicinity of the water pump. Then, start tightening the bolts and secure the tensioner in place.
Step 4. Aligning The Cam And Crank
First, make sure that the timing marks of the cam’s and crank’s sprockets are aligned with the marks of the oil pump. We’ve aligned the timing marks in the previous steps, so you just need to recheck if the alignment is perfect or not. Then, begin installing the timing belt around the crank’s sprockets, oil pump, and camshaft. Leave no slack in the timing belt but there should be some in the sprockets because the tensioner is to be installed there.
Step 5. Check If The Installation Is Proper
Start by reconnecting the negative battery cable. Then turn on the ignition and start the engine. Now, keep the engine running until the thermostat opens. If you don’t see the right ignition timing, adjust the timing again and check again.
Check out our article on how much horsepower does a camshaft add?
Important Points To Keep In Mind Before Starting The Alignment Procedure
Like already mentioned, the process could differ depending on the engine you have. So, there are some specific things to keep in mind based on the type of engine you are working with here.
Working with an interference engine:
If the timing belt on an interference engine has broken down, chances are that the valves and pistons have also been damaged. In this case, you need to strip down the engine top and check if there is any damage or not. You can make sure of it via a compression test but that requires you to rotate the crankshaft and camshaft. Rotating the crank and cam without having the timing belt in place can inflict even more damage.
So, simply remove the cam cover and inspect if any damage has been caused or not. Usually, the piston or valve collision would break the cam’s followers, pushrods, etc. If there are any broken pieces inside the cam box, there is damage for sure and you need to strip off the engine to repair it anyway. Once you’ve repaired the damaged parts, you can start with the alignment procedure.
Note: Keep in mind that the alignment procedure needs to be followed perfectly even if there was no damage caused by the snapped timing belt. Otherwise, rotating the cam and crank to align them would cause damage.
Working with a non-interference engine:
With a non-interference engine, chances are that your engine might just be fine even if the timing belt has broken. This is because, in non-interference engines, the valves will not be in contact with the pistons if a timing belt failure occurs. So, simply follow the alignment procedure given above and you should be good to go. Marks are supposed to be already scored on the faces of your crankshaft pulley and cam sprockets.
Conclusion
Aligning your cam and crankshaft is a tricky affair and you need to be very cautious while executing the procedure. Be very careful while turning the cam and crank because if the piston interferes with the valves, they won’t be clocked correctly. You can’t leave even a single tooth out of alignment because that will prevent the engine from working efficiently. However, if you have followed the above instructions to the letter, there is no room left for worry.